How to Prepare Your First Vegetable Growing Area – Tips For New Growers
Whether You Opt For A Traditional In-Ground Plot, Raised Beds Or No Dig, Preparation Is Key To Soil Health And Long-Term Success. Here Are My Tips On How to Prepare Your First Vegetable Growing Area
Table of Contents
Step 1: Choose and Clear the Site
Location: The ideal site receives at least six hours of direct sunlight a day. South facing level or gently sloping sites are preferable. But many gardeners grow remarkably good crops in less than ideal conditions. I do however caution against attempting to grow crops where there is no direct sunshine for less than 3-4 hours a day. It isn’t impossible, but it is much more difficult.
Remove Debris: Clear any stones, rubbish, or large pieces of wood. Hopefully you will be talking over a well maintained area but some plots are offered when full of weeds and rubbish! Think carefully before taking on more than you can manage. Sometimes a smaller plot will be easier in the early years.
Mark Out: Use string and pegs to clearly define your growing area. Many new gardeners find it is best to focus on getting smaller areas growing very well in year one rather than attempting too much at once. That’s not to say you can’t grow something across the whole plot, but many people find it easier to devote some areas to less demanding crops, that take a lot of space but are easy to grow, in year one. Crops such as squash, potatoes, green manures are possible lower maintenance crops in this areas.
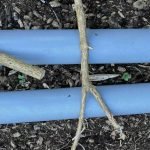
Remove Perennial Weeds: This is the most important step. Dig out all deep-rooted perennial weeds (e.g., bindweed, couch grass, docks) ensuring you remove the entire root. If the area is covered in turf, either dig in or remove the turf completely, or employ the “No-Dig” method (see below).
Gardening in the soil, as practiced in cottage gardens, allotments, market gardens and small holdings for years
Step 2: Test the Soil (Optional but Recommended)
pH Test: Vegetable plants generally prefer a neutral soil pH (around 6.0 to 7.0). An inexpensive soil test kit will tell you if your soil is too acidic or alkaline. But some kits tend to be less than reliable and only give a general idea. Ensure you gather enough soil samples and mix them well before taking a sample to test. Otherwise you may be testing the spot where they always had a fire or had spilt a bag of lime!
Acidic Soil: Can be corrected by adding garden lime.
Alkaline Soil: Is harder to correct, but adding well-rotted manure/compost will help buffer the pH.
Step 3: Improve the Soil Structure and Fertility
The next action depends on your chosen method:
A. Traditional Digging Method:
Digging Over: Use a spade or garden fork to turn the soil over to a depth of about 25-30 cm, breaking up large clumps as you go. This loosens the soil, improving aeration and drainage.
Incorporating Organic Matter: Mix in a generous amount of well-rotted organic matter, such as homemade compost or well rotted manure. Aim for a layer of 5 to 10 cm mixed into the top 20 cm of soil. This feeds the soil life and dramatically improves both heavy clay and light, sandy soils.
B. The “No-Dig” Method (My Preferred Method & Highly Recommended for Beginners):
Lay Cardboard: Cover the entire area (including any remaining weeds or turf) with a thick layer of plain, unprinted cardboard, ensuring all joins overlap significantly to block light. Wet the cardboard thoroughly.
Top with Compost: Apply a substantial layer of good quality, weed-free compost (at least 15 cm deep) directly onto the wet cardboard. Do not dig this in. The cardboard will suppress the weeds below, and the compost provides a perfect growing medium immediately. This method is less physically demanding and helps to preserve the soil structure. Many traditional growers say this is an expensive method and doesn’t work. But in my experience as a retired commercial grower I find this is the most effective and easiest way to grow good crops. My advice however is to start a small area of No Dig to begin with so you can get to understand the method. That way you will not use too much compost in year one and can gradually build your area of No Dig over a few years.
Step 4: Final Preparation
If going down the dig route the next thing is to …
Rake: Use a rake to level and smooth the surface of the soil or compost layer, creating a fine ‘seedbed’ for sowing.
Water and Wait: Allow the soil to settle for a couple of weeks before planting seeds directly into the ground, especially if you have dug it over.
If you are going no dig you can immediately sow into the prepared area OR plant module grown plants which will love the compost used.
How to Prepare Your First Vegetable Growing Area Conclusions
Growing your own food is healthy in two ways. Firstly there is the exercise and relaxation you get from tending a garden or plot. Secondly there are all the health benefits of (potentially) pesticide free food from your own plot of land.
But starting to grow your food isn’t always easy when your first start. For that reason I built this website to help newbies and those with a lot more experience to garden better. Below are ways to use this website effectively.
Tips on Using This Website
There are many new terms and techniques to learn when you first start growing. You can use the search bar on the top right off any page to research the more than 600 articles here. Or follow the links in the articles. Alternatively join one of my Facebook groups and post your questions there. No question is to basic or silly to ask, we all started knowing nothing about growing and learn a little more every day!
Tag: How to Prepare Your First Vegetable Growing Area